WebODF v0.5.0 released: Highlights

Today, after a long period of hard work and preparation, having deemed the existing WebODF codebase stable enough for everyday use and for integration into other projects, we have tagged the v0.5.0 release and published an announcement on the project website.

Some of the features that this article will talk about have already made their way into various other projects a long time ago, most notably ownCloud Documents and ViewerJS. Such features will have been mentioned before in other posts, but this one talks about what is new since the last release.

The products that have been released as ‘supported’ are:

  • The WebODF library
  • A TextEditor component
  • Firefox extension

Just to recap, WebODF is a JavaScript library that lets you display and edit ODF files in the browser. There is no conversion of ODF to HTML. Since ODF is an XML-based format, you can directly render it in a browser, styled with CSS. This way, no information is lost in translation. Unlike other text editors, WebODF leaves your file structure completely intact.

The Editor Components

WebODF has had, for a long time, an Editor application. This was until now not a feature ‘supported’ to the general public, but was simply available in the master branch of the git repo. We worked over the months with ownCloud to understand how such an editor would be integrated within a larger product, and then based on our own experimentation for a couple of awesome-new to-be-announced products, designed an API for it.

As a result, the new “Wodo” Editor Components are a family of APIs that let you embed an editor into your own application. The demo editor is a reference implementation that uses the Wodo.TextEditor component.

There are two major components in WebODF right now:

  1. Wodo.TextEditor provides for straightforward local-user text editing,by providing methods for opening and saving documents. The example implementation runs 100% client-side, in which you can open a local file directly in the editor without uploading it anywhere, edit it, and save it right back to the filesystem. No extra permissions required.
  2. Wodo.CollabTextEditor lets you specify a session backend that communicates with a server and relays operations. If your application wants collaborative editing, you would use this Editor API. The use-cases and implementation details being significantly more complex than the Wodo.TextEditor component, this is not a ‘supported’ part of the v0.5.0 release, but will, I’m sure, be in the next release(s) very soon. We are still figuring out the best possible API it could provide, while not tying it to any specific flavor of backend. There is a collabeditor example in WebODF master, which can work with an ownCloud-like HTTP request polling backend.

These provide options to configure the editor to switch on/off certain features.

Of course, we wholeheartedly recommend that people play with both components, build great things, and give us lots of feedback and/or Pull Requests. 🙂

New features

Notable new features that WebODF now has include:

  • SVG Selections. It is impossible to have multiple selections in the same window in most modern browsers. This is an important requirement for collaborative editing, i.e., the ability to see other people’s selections in their respective authorship colors. For this, we had to implement our own text selection mechanism, without totally relying on browser-provided APIs.
    Selections are now smartly computed using dimensions of elements in a given text range, and are drawn as SVG polygon overlays, affording numerous ways to style them using CSS, including in author colors. 🙂
  • Touch support:
    • Pinch-to-zoom was a feature requested by ownCloud, and is now implemented in WebODF. This was fairly non-trivial to do, considering that no help from touch browsers’ native pinch/zoom/pan implementations could be taken because that would only operate on the whole window. With this release, the document canvas will transform with your pinch events.
    • Another important highlight is the implementation of touch selections, necessitated by the fact that native touch selections provided by the mobile versions of Safari, Firefox, and Chrome all behave differently and do not work well enough for tasks which require precision, like document editing. This is activated by long-pressing with a finger on a word, following which the word gets a selection with draggable handles at each end.
Touch selections
Drawing a selection on an iPad
  • More collaborative features. We added OT (Operation Transformations) for more new editing operations, and filled in all the gaps in the current OT Matrix. This means that previously there were some cases when certain pairs of simultaneous edits by different clients would lead to unpredictable outcomes and/or invalid convergence. This is now fixed, and all enabled operations transform correctly against each other (verified by lots of new unit tests). Newly enabled editing features in collaborative mode now include paragraph alignment and indent/outdent.

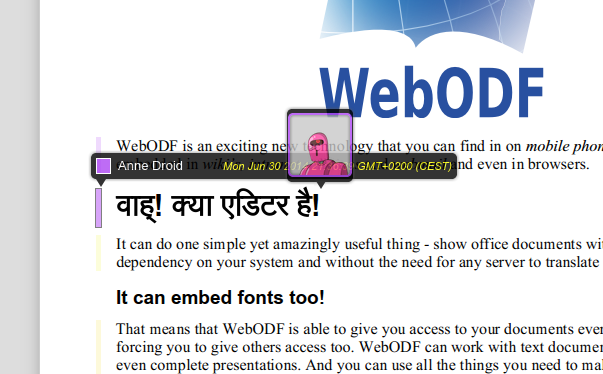
  • Input Method Editor (IME). Thanks to the persistent efforts of peitschie of QSR International, WebODF got IME support. Since WebODF text editing does not use any native text fields with the assistance of the browser, but listens for keystrokes and converts them into operations, it was necessary to implement support for it using JavaScript using Composition Events. This means that you can now do this:

Chinese - Pinyin (IBUS)
Chinese – Pinyin (IBUS)

and type in your own language (IBUS is great at transliteration!)

Typing in Hindi
Typing in Hindi
  • Benchmarking. Again thanks to peitschie, WebODF now has benchmarks for various important/frequent edit types. benchmark

  • Edit Controllers.  Unlike the previous release when the editor had to specifically generate various operations to perform edits, WebODF now provides certain classes called Controllers. A Controller provides methods to perform certain kinds of edit ‘actions’ that may be decomposed into a sequence smaller ‘atomic’ collaborative operations. For example, the TextController interface provides a removeCurrentSelection method. If the selection is across several paragraphs, this method will decompose this edit into a complex sequence of 3 kinds of operations: RemoveText, MergeParagraph, and SetParagraphStyle. Larger edits described by smaller operations is a great design, because then you only have to write OT for very simple operations, and complex edit actions all collaboratively resolve themselves to the same state on each client. The added benefit is that users of the library have a simpler API to deal with.

On that note…

We now have some very powerful operations available in WebODF. As a consequence, it should now be possible for new developers to rapidly implement new editing features, because the most significant OT infrastructure is already in place. Adding support for text/background coloring, subscript/superscript, etc should simply be a matter of writing the relevant toolbar widgets. 🙂 I expect to see some rapid growth in user-facing features from this point onwards.

A Qt Editor

Thanks to the new Components and Controllers APIs, it is now possible to write native editor applications that embed WebODF as a canvas, and provide the editor UI as native Qt widgets. And work on this has started! The NLnet Foundation has funded work on writing just such an editor that works with Blink, an amazing open source SIP communication client that is cross-platform and provides video/audio conferencing and chat.

To fulfill that, Arjen Hiemstra at KO has started work on a native editor using Qt widgets, that embeds WebODF and works with Blink! Operations will be relayed using XMPP.

Teaser:
blink-prototype

Other future tasks include:

  • Migrating the editor from Dojo widgets to the Closure Library, to allow more flexibility with styling and integration into larger applications.
  • Image manipulation operations.
  • OT for annotations and hyperlinks.
  • A split-screen collaborative editing demo for easy testing.
  • Pagination support.
  • Operations to manipulate tables.
  • Liberating users from Google’s claws cloud. 🙂

If you like a challenge and would like to make a difference, have a go at WebODF. 🙂

Bringing OpenDocument to the web, collaboratively

Last week, the first version of OwnCloud Documents was released as a part of OwnCloud 6. This incorporates  a subset of editing features from the upstream WebODF project that is considered stable and well-tested enough for collaborative editing.

DocumentsThis was a much-anticipated release and lots of nice reviews are pouring in, so I thought I’d take some time to write about WebODF and all the stuff we at KO GmbH been working on upstream.

So what is WebODF?

WebODF is a javascript library that lets you display ODF files in your browser. Think of it as PDF.js, but for ODF. You just throw a webodf.js script on your server, and do a couple of javascript calls to render an ODF file. It works completely client-side, no serverside ODF processing required. You only need a server to actually serve the javascript file. However, WebODF does not do any conversion to HTML. It really shows you the actual ODF, styled with CSS. To see this, you can simply inspect the document:

Inspecting a document in the WebODF Viewer.
Inspecting a document in the WebODF Viewer in Chrome.

As part of the WebODF project, you also get the viewer (shown above) and an editor application.

Aside: We’ve written a unified PDF and ODF viewer called ViewerJS and have released it as a standalone package that you can put on your server. This uses both the PDF.js and WebODF backends to show you a wider variety of formats.

Editing

The WebODF editor works by default in single-user mode. After more than a year of hard work laying the foundations for editing, we have now begun to implement new features rapidly.

The Editor UI is written using the Dojo toolkit and is ready to use for the average user already.

WebODF Editor action shot.

It lets you:

  • Apply, Remove, and Modify Paragraph Styles (with proper style inheritance handling).
  • Do basic Undo/Redo.
  • Apply direct text formatting through the toolbar and hotkeys – Bold, Italics, Underline, Strikethrough.
  • Change font style and size.
  • Modify indentation.
  • Apply different alignments – Left, Center, Right, Justified.
  • Insert and Remove links.
  • Add Images.
  • Zoom in and out.
  • Add and Remove Annotations.
  • Open, Edit, and Save an ODT document, both completely client-side, without ever talking to a server!

Collaboration

The recent NSA scandal has shaken the faith of many in ‘the cloud’, or at least the services hosted by the likes of Google and Microsoft. Therefore, being able to self-host this is a very attractive idea in the recent climate. However, open-source solutions in this space have generally dealt with plaintext or only very simple formatting (think Etherpad), which is why we’re very proud to roll this out.

collab
Collaborative editing in action. Note the improved selections and paragraph edit history markers.

The collaborative server, included with OwnCloud Documents, lets users join a ‘session’, which is basically a document with a history of edit operations. Operations are small units of edits (think ‘commits’). In a collaborative session, we use Operational Transformation techniques to make sure that operations fired by various clients will eventually result in a consistent state everywhere. When a new client joins an existing session, all earlier operations are played-back for it to reach the current state.

Note that this editing is not turn-based; this is true inline collaborative editing where users can join a document and start editing straight away. Like in other similar applications, the OT is smart enough to not give a no-op result when one user inserts a character and another presses ‘delete’ at the same position – instead, the second user will remove it’s target character and the new character will be inserted next to it in the ‘converged’ state; thus respecting the intent of the edit operations.

When multiple users edit a paragraph, it gets a  ‘marker’ on it’s left in the color of the last editing user. Hovering over it shows a tooltip that provides information on which user edited it last.

Users’ selections are also collaborative, so you can neatly see what any other user has selected. This is useful for ‘indicating’ a region whilst reviewing something.

At the moment, we have our own homecooked library of Operations, for actions like cursor addition/movement/removal, text insertion/removal, style application, and more. Hopefully, we shall be able to agree upon a common spec for operations in the future with other developers for interoperability.

PS: Grab the source code at https://github.com/kogmbh/WebODF

Europe Tour, 2012

In June and July 2012, I backpacked across Europe for one whole month – visiting (chronologically):

  • Budapest, for a Prezi hack week. Didn’t join them later, but had fun.
  • Tallinn, for Akademy. Met several KDE buddies and got to know some new KDE-in people. OldTown was beautiful. Especially after two glasses of wine. Tried eating wild boar, but couldn’t finish it.
  • Helsinki. Reached here after crossing the sea via a ship (my first time). Visited some of the churches. Picked a random tram and got lost on purpose. Bumped into a (ex-Nokia, ha!) Django hacker there. Spent my 21st birthday there alone, walking about in the Helsinki Zoo and feeling content. Suomenlinna was very beautiful, with an excellent lagoon.Ferry to HelsinkiDucks Bomb Lagoon
  • Paris. Enjoyed everything. Couch-surfed with an old school buddy and also a fellow Indian KDE hacker. Had great evenings walking along the Seine, soaking in the beautiful live music in the golden night.Louvre
  • Milan. Stopped here for a few hours, waiting for trains.
  • Venice. Spent hours sitting in the water buses, visiting the places of note, and generally walking around. Couch-surfed at a wrestler’s place, where we were made to wrestle half-naked on a floor mat 3 hours in the morning and 3 hours at night. Awkward at first, but fun later. The body ached for a few days afterwards.Venice
  • Florence. Walked around a bit. Beautiful city, but wasn’t as fun because most of the exciting places were closed at that time.Florence
  • Pisa. Saw the leaning tower, didn’t pose for a photo with it. Had some excellent food.Pisa
  • Naples/Sorrento. Had a great time here. Stayed in a camp-like thing by the beach. Visited some nice places nearby like the Amalfi beach; climbed Mt. Vesuvius and walked along the volcano’s crater.Vesuvius Vesuvius2
  • Rome. My second visit. Was pretty tired at this point, so didn’t walk around too much. Saw some of the places I hadn’t seen before.
  • Prague. Upon landing here, discovered that the hostel I had a reservation with was way too far out of town to be practical. Bumped into a couple of Googlers from the ‘States who were similarly looking for a place, and found one after much walking about. Also, Martin of KDE Telepathy fame showed me the nicest places in the city – many thanks to him. This was also the most beautiful city I’d ever seen.Prague1 Prague2

Awwation update: Cross-Browser and Offline Support

In my last blog post about Awwation, I had talked about live thumbnails. What I’ve discovered is that since <use> references the original SVG, the editor becomes really slow as you add more presentation nodes to the timeline, because the changes are reflected in real-time across all the thumbnails. For short presentations this isn’t really a problem, so I’m keeping this feature as it is till I figure out a more efficient solution.

My other pet peeve was that the presentation would not animate in several browsers – particularly Opera. This has now been fixed with the latest version of the Sozi script, which is much faster and seems to work on all major browsers – I’ve tested on IE9, Safari, Firefox, Chrome, Arora, the iOS browser, and the one on my phone: the Nokia N950 developer device.
So that’s it for the presentations. I’ve also tried to make the editor work across all browsers – the saving with the FileSaver polyfill worked only in Chrome, and since I really want everything to be done client-side, I have used a tiny script, Downloadify, that saves the presentation using flash if you’re not using Chrome.
Oh, and now instead of the default name aww.svg, you now get a system dialog asking you for the filename and location for the generated presentation.

The next major thing I finished off was the support for offline theming.
I’ve cloned the Google Fonts Collection and base64-encoded some fonts and embedded them into the CSS theme files, so you don’t have to do any CSS @import for the fonts from Google’s CDN. Next, I’m XHRing the theme files (statically hosted along with the editor) and injecting the CSS response into the presentation when you pick a theme, instead of stuffing an @import between <style> tags. Oh, and since there’s no @import URL anymore, I can use a relative path to the theme file for the XHR and therefore the theme can be retrieved from the same static hosting as the editor, and the theming in the editor and the presentations works offline, too.

So, now everything in the presentation works offline, except for images.
Images are a different breed – right now, the image embdedding functionality from SVG-edit takes URLs to remote images. Ideally, in the editor, I want to retrieve the images and embed their base64 dataURL in the SVG, but this will require a cross-domain request, which is a security problem and therefore disallowed by browsers. I could allow the user to read in an image from their local machine with the HTML5 File API, but sadly this isn’t supported by IE9.
So right now, you need an internet connection to view presentations with images. Hopefully I can figure out a solution soon for this.

Interestingly, I’ve been able to successfully create an Awwation entirely on my phone using the editor, from within Mobile Firefox! In it’s current state, there are many more things that can be used to make the Awwation editor more touch-friendly though.

TCR

Now that I’ve graduated from college, I should have some free time to work on this project. These days, I particularly enjoy working from The Chocolate Room, a popular cafe chain here in Ahmedabad, where they have really nice coffee and crushed ice drinks for the summer. Nothing better than great coffee to to help you code. And they have power sockets for people like me to plug in their laptops, so that’s great!

Awwation update: Live thumbnails!

In my last Awwation update I talked about the new CSS Themes support.

This time, I have another improvement. In the old version, the timeline strip had bad thumbnails. I was using canvg to render the SVG onto a Canvas and then drawing the Canvas bitmap as a snapshot:

Old strip. Bad snapshots.

This time, I’ve dropped the Canvas approach altogether since I discovered the <use> SVG element. <use> allows you to ‘href’ to an SVG element residing in the DOM and display a ‘reference’ to that SVG. You can also add overriding properties such as a viewBox and transforms.

In action:

New awesome strip. Live, moving, 100% accurate snapshots.

Now you can pick any element as a path node in the presentation timeline, and a snapshot of it as it exactly as it appears in the document, during the presentation, will be shown in the strip. How is this better than Prezi’s strip? Well, here, changes are reflected as they happen – so, if I’m moving an element around in the editor, you can see it moving around in the strip too!

Awwation update: Themes support

Last week, I blogged about how I wrote the first iteration of Awwation, an HTML5 Prezi clone. Somehow the blog post surfaced onto the front pages of Slashdot, and /r/programming for a couple of days, and the project got a decent following on Github (it was a trending repo that day!).

This prompted me to polish the code a bit to make it presentable to potential contributors, and now the app is in a somewhat usable state.

The first iteration was rather bland, so I thought it would be a good idea to have presentation themes like Prezi does. As it turns out, this was easy – SVG can be styled using CSS.

So here’s a sample CSS theme for Awwation:

@import url(http://fonts.googleapis.com/css?family=Berkshire+Swash);

text {
    font-family: 'Berkshire Swash', cursive;
    text-shadow: 0px 0px 8px rgba(150, 150, 150, 1);
}

rect {
    stroke: #AEAEFF;
}

ellipse {
    stroke: #FF0000;
}

That’s it, really.

And here’s a new ‘Themes’ menu, with the above theme in action:

Themes menu. Selecting a different theme instantly changes all elements in the document to the new style.

What next? A theme creator tool would be a good idea. I’ve opened an issue for that. Contributions are welcome.